Sunday, 8 April 2012
Eggmas
You may have noted an absence at my end of things on Ugly!Cake, though likely not as my posts are at best sporadic. The reason this time is that I have been moving. My baking gear has been in boxes for over a month, and I'm still not really moved, just in a halfway house rental until it all comes together.
Whilst I can't predict my bakes at the moment, I do have two posts in draft, one an ode to my old oven, and the other about kitchen 'furnishings'.
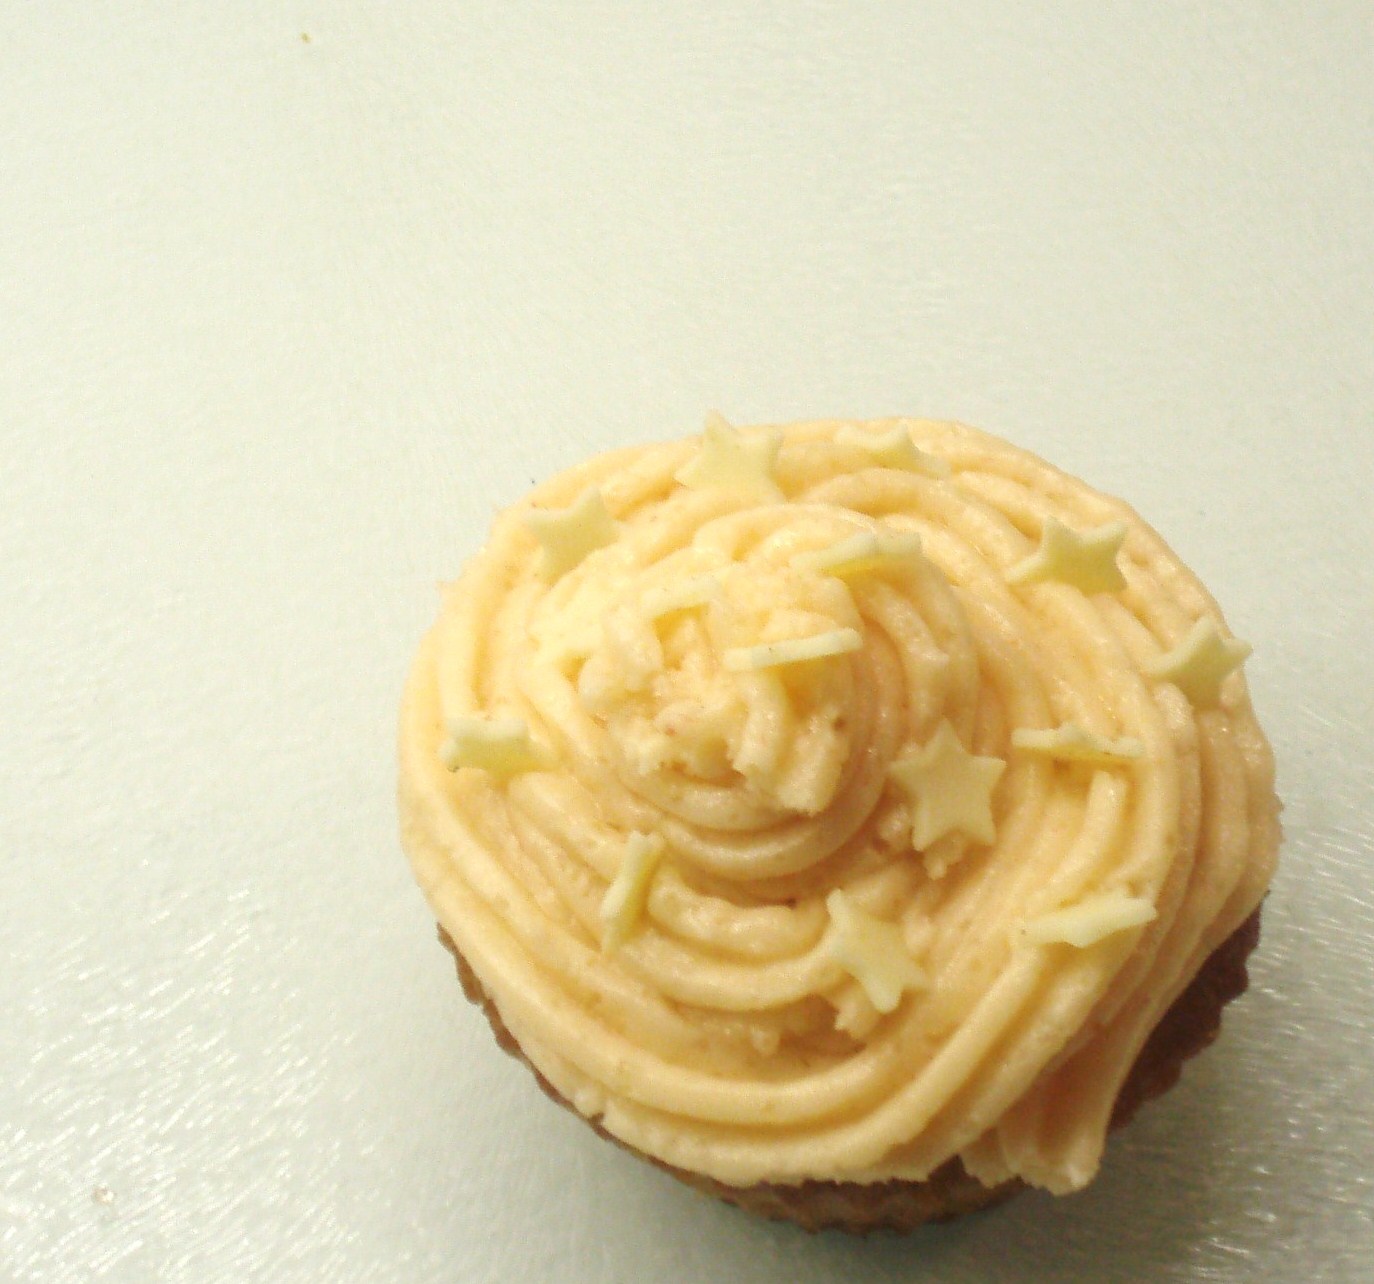
However, as here in England we enjoy a 4 day weekend over Easter, and because it's only blimmin' Easter, I had to do something.
It's not a proper bake, but it feels like the start of a return to form. Whatever you're doing, and whatever your religious persuasion (I'm agnostic, flirting with C of E personally), I hope you have a very Happy Easter :)
Sunday, 29 January 2012
Retrospective; Hooking
I had tried knitting in the past, and whilst it is very relaxing, I never felt like I was getting anywhere with it. I can knit, and purl, and that is about it. I can't read knitting patterns and I find that a quick payoff is more likely to tie down my butterfly mind to a hobby. With crochet, I picked it up fast, and I went home from my first lesson with Tom with a bookmark. I had made something, and I could see my errors melting away, my stitches becoming beautiful and even. Within weeks I had made my first doll, and my first scarf. A gift and an item of clothing. I never got anywhere near that far with knitting, not even after months. I don't know why. Perhaps that is the next request I'll send Tom's way. Please, Tom, teach me to knit even a little like you!
Around this time, my current employers contacted me to offer me my current job, so I handed in my notice at work, and was counting the days until my new, exciting career (from a PA in a small firm to part of a team in for a huge global company, working on vastly interesting clients). My boss' wife, who was my occasional coworker, was heavily pregnant at the time with their son, and with my new found talent, I decided to make them a present as a thank you for the employment (I entered that job from poverty, after a year on benefits after being made redundant- a quite low period of my life), and as a way to congratulate them on their future son. A quick rummage online found a booties pattern on Lion Brand (lionbrand.com/patterns/70225AD.html if you are interested), and got to work.
Now, whatever you think of Lion Brand, they have a lot of material available for free, though some of it has errors. For an experienced crocheteer (hooker? I don't think either of these phrases are correct, but I am going with them, dangnammit) it is probably a bit simple and plain, and the errors that crop up altogether too often are down right infuriating, but for a beginner it is a good place to start. There are some fabulous tutorials on stitches and reading patterns based on their patterns online (my first and the one I would highly recommend can be found here: http://www.visualcrochet.com/how_to_crochet_a_giraffe.html (please note this is in US crochet, as are the patterns at Lion Brand)).
Back to the booties. I sat down to watch the grand prix with my mother one Sunday and finished one. Now I could churn one of these out a lot quicker, but at the time this was one of my first crochet projects and I was still getting used to the different terminologies, and really any crochet that didn't involve basic horizontal rows. The second took several days in shifts; lunch breaks, while waiting to xollect an order from the printers... Finally they were done, and on time, so when I took my boss' wife home for the very last time, I handed over a pair of homemade machine washable booties, and wished her my best. She was touched. Homemade presents really are the best.
Retrospective; Ugly!Cheesecake
Having never made a cheesecake, (I know, isn't that tragic?) I sat down a researched and bought my ingredients (whipping cream, marscapone, biscuits and butter for the crumb base) and pondered flavours.
Summer 2011 saw and incredible fruit yield due to the favourable spring conditions bringing on fruit early and in abundance. Blackberries that would have normally still been unripe at that time were in full fruit, laden with sweet, ebony berries just begging to be picked and guzzled in handfuls.
Upon dropping my then boss' heavily pregnant wife home at the end of the work day, I parked up near a large patch of blackberries I had spotted often on the same journey into south London. Being non-native, she was always fascinated by the wild fruit I would point out on our journeys, trees drooping with fat, ripe plums, early aples and those still ripening. It sometimes feels like all our ancient english orchards were made into A roads, and the landscapers forgot to tidy up around the edges, leaving these beautiful forgotten bounties to smash, overripe, pulpy and unwanted onto the road side year after year, to be picked over by birds or pulverised by speeding tires.
I digress.
Within fifteen minutes, with only a few bramble scrapes, I had a healthy haul of blackberries, more than I really needed for the coolis to flavour to the cheesecake. Once home, a quick clean and a sort left me with about 150g of free, wild fruit. Blended with two tablespoons of golden caster sugar, it made a florally fragrant, mellow and fruity deep blue purple sauce, ready for greater things.
A few pulverised digestives later, mixed with melted butter and a teaspoon or so of spice (cinnamon, ginger, clove and nutmeg) and the base was done. The main part of the cheesecake was the whipped cream, marscapone and sugar, mixed together lovingly, which kept the filling light, which I found delightful, as cheesecake can be over dense for my tastes. I pored this in in quarters, at each interval spooning in a quarter and muddling it with the coolis/sauce/delicious blackberry goop. When cut, the cheesecake was full of ribbons and swirls of purple. Yum.
On the top, I just let the coolis drop with as much artistry as possible.
All in all, it wasn't the prettiest cheesecake there has ever been, nor the tidiest. But it was bloody delicious. Num.
New Year Bakesolutions (which are like resolutions about baking)
How are you? It's been a year since my last proper post. A year. There's really no excuse for that kind of slovenliness. It isn't even that I've been off the brownies, or have sworn off sponge cake. Developed a phobia or fondant, or nixed the nougat. I'll stop that now, and be straight up with you.
This past year has brought many changes to my life; two new jobs, new hobbies and larger scale life changes including the selling of my current house, and the arduous, stressful task of looking for a new home I could bear to live it, i.e., does it have a kitchen I could bake in?
I would say I have baked less overall in the last year. The difference between being able to afford to bake (now) and having the time to bake (then) is a difficult balance to weigh up. It is now very unusual for me to bake on a weekday evening, for example, as I don't get home until half past seven, by which time I need feeding and to feed my pets, and a little rest time, ready to get into bed and be up again at six to make quarter past seven coach. I know this differs very little from anyone else's commuter lifestyle, but there we are.
Funnily enough, I think this blog helped me get my current position; it came up in all my interviews, as apparently even the slenderest londonites are total cake heads. And I hasten to add, my work has very little to do with baking or creativity in its wider form; I work in business recovery, handling internal compliance. Have some jargon, Internet. I hope you like it. It's fresh!
Having said all this, I did win my first ever baking competition this year, and began to dabble in sugar past decorating, which have been great fun, challenging, and yet very rewarding. I've made a lot of money for charity and non-profit organisations this year via auctions, bake sales and bake offs, and I hope to do more of the same this year.
In this new and shiny year (year of the dragon!) I hope for many things. I hope I can get my offer accepted on the dreamhome I found yesterday (Internet, you should have SEEN the kitchen. And it had real fireplaces!) I hope I can afford my mortgage. I hope my parent's divorce goes through soon and with as little further emotional trauma to my mother as possible. I hope my elderly cats see 17 and 18 respectively. I hope my pet rats have a healthy happy year and don't find the move too stressful. I hope my friends will have happier years. I hope for progression, creatively and in the workplace. I hope I find time to breathe.
In terms of resolutions, well, those which are pertinent to this blog, I have a few.
Post more often; despite baking less overall, I still bake often, so there is little reason I shouldn't let you all know about it.
Buy a new camera; my old one finally gave up the ghost mid rat photoshoot in October this year. I have been shopping around for a new one ever since; it is finding the one or two hundred pounds for the outlay that's the trouble.
Keep pushing the boundaries; this year I have made some famously difficult things, including macarons (they ain't so tough), and tried a vast number of new things (sugar paste modelling, cheesecakes, custards...). I can do more, and better.
Use my cookbooks; I spent at least £60 on cookbooks last year, ranging from healthy soups, to cupcakes, to traditional british baking, to Nigella. I look forward to the challenge of living alone and feeding myself. I've done it before, but now perhaps, whilst still endorsing thrift, I will have the chance and drive to try to vary my palate a little more. Though my standard fare is bloody delicious all the same.
In the meantime, I have a collection of pictures I intended to write full posts for and never did, so I will stick them up and annotate, and if any should interest you, please let me know and I'll do my utmost to get a recipe or method online.Today will be all about writing workshops and baking, as a wind down from yesterday's house hunting... And a treacherous amount of cheese and wine. Oops.
Hate to see you go, Internet, but love to watch you leave.
Natasha x
Monday, 3 October 2011
Slap my wrists and call me sally...
Dearest darlingest internet! Where have you been all these months?! Or rather, where have *I* been... for shame, for shame...
The answer is somewhat convuluted, full of pitiful excuses about job changes, lack of time and general slovenliness, which I will spare you, because I am inherently kind. What is more important is that I am here now, with a backlog of blog entries to post, all filled with delicious produce and lovely crafts. Are you excited, dear internet? I know I am.
So sit back and relax, and soon I will spam you with goodies and gluttunous gossip. Huzzah! But until then, enjoy this adorable Origami crane I made not so long ago on a whim.
Thursday, 27 January 2011
Ugly!Truffles
...What a miserable note to start on. Quickly, let me allay your S.A.D with a great big hugsome wallop of chocolate goodness!
Following on from my festive trufflemaking, I've realised/remembered how much I adore making chocolates. Before I became so into baking and preserving as I am now, my passion was being a Chocolatier. I even considered throwing in the towel of trying to find a job in a more conventional way, and training to become one. I still do. My sensitive skin and food allergies, including the fateful peanut, are my main preventatives. Being able to play around at home, however, brings me great joy, and, as with baking, destresses me utterly.
Ganaches/Truffles (I'm not geeky enough to really know the difference) are my passion, though, as I beleive I have afore mentioned, I love to make fudges, and to do 'enrobed chocolates' also- gingers and marzipans are christmas staples, and cake truffles (a method I will surely share when I recycle my christmas cake and possibly pud) are a great thrifty treat.
After my christmas efforts (the pink and glitter truffles, which I believe are the previous post), i was eager to make some ganaches with a bit more boozy oomph. I've had a wealth of praise and thanks for the gifts I made of them at christmas- how light and floral the P+G truffles were (they were made with a dash of forest raspberry brandy- AKA Magic Potion), for example. But as nice as they were, I wanted to work with the recipe and make something really special of them.
I did two varieties this time- a milk chocolate and Bailey's concoction, and a boozy white chocolate and Cointreau. I am going to write this as a method, rather than a recipe. The digits are all in there if you want to give it a whirl.
For both batches, I used 250g of a high quality chocolate (the waitrose branded belgian chocolate from the confectionery section rather than the baking aisle- it tempers beautifully and tastes divine). For the truffles over christmas, I used 180ml of double cream. This time I cut back the cream to 150 to attempt to make it thicker, as I would be adding more alcohol liquid later.
The cream and knob of butter were brought to the boil, then poured over the chocolate and set aside to melt. After 3-5 minutes I whisked the mixture in glossy perfection, before adding the chosen spirit. At christmas, those just 'perfumed' truffles had 2 tbsp per mix. This time I added 5-6tbsp. The result was a fragrant, flavoursome, boozy delight. I don't think you need to add any more than this to a mixture.
The thing I will try with this is perhaps cutting back the cream more, as it is still a little too loose to roll. Instead I used my chocolate moulds. Now, these are made of silicon, and you can buy them from any good cookery shop. For the milk chocolate ganache, I lined a square mould with milk chocolate. The best way I have found of doing is this:
- Melt the milk chocolate.
- Pour a little into the mould- about twice what is needed to just cover the bottom.
- Using a very clean paintbrush (preferrably unused), paint the chocolate up the sides of the mould to begin to form the shell. Do this a few times, and gently, to try and make it stick.
- Repeat for the rest of the moulds.
- Before putting it in the fridge, go back and repaint the sides from the chocolate in the moulds. This is like a second coat, and as the chocolate will have begun to set it will set thicker on the sides now.
- Refridgerate from 20 mins or so.
It may seem fiddly, but it is the best way I have found of getting good results.
For the milk I did just a simple milk chocolate shell. For the whites, I painted each mould with a smear of milk, let it set, then made my shell. At the end, I topped off with milk chocolate instead of white, to make a 'viennese' truffle. Technically the chocolate should have been combined from the start, but hey, I'm a rebel.
Thursday, 30 December 2010
Pink and Glitter
I make ganaches and truffles several times in a year, but since Christmas is a feast, it seems incomplete without them. That and they make lovely gifts. And, well, if you can make them look as festive as the season, well...
This year I made two different flavours of truffles; Milk Chocolate with a hint of cointreau, and White Chocolate with a hint of Forest Raspberry Brandy (A.K.A Magic Potion). That sounds terribly chic, doesn't it? Like most of my recipes, I wish they were more complicated, so I could pretend to be culinarily gifted. Ah, well.
This is the recipe I use, which seems to work with any chocolate.
Chocolate Truffles
180ml Double Cream
30g Unsalted Butter
230g-250g chocolate.
Regarding chocolate, before I go into method. The better quality the chocolate, the better the flavour. Belgian chocolate is particularly lovely. If using dark, go for something around the 70% cocoa solids mark. For milk, anything over 35% is going to be a bonus. For white, it really seems to be more about quality than content for flavour, but the belgian chocolate I used was 28% and is divine. For a bittersweet chocolate, I have used half dark and half milk too; you get the heady cocoa colour and tang, but it melts creamily away into sweetness. But then, I am a heathen, and I do so love candy-sweet white and thick creamy milk. Yum.
Whatever chocolate you are using, break it into pieces in a heat proof bowl and set aside.
Heat the cream and butter over a medium heat in a good pan. Once the butter has melted and been combined by whisking gently, bring to the boil. Take off the heat as soon as it has boiled, and pour it over the chocolate.
Leave the cream-chocolate bowl alove for a few minutes, then whisk it through. The hot cream will have melted the chocolate. When ready you with have an even, glossy, sumptuous chocolate ganache liquid.
If you wish to make boozy or flavoured truffles, this is the time to add your flavouring. For spirits, 2 tbsp will give it a hint, a fragrance and a slight taste. 4-5tbsp or so will give you a kick. For non alchoholic flavourings like vanilla, lemon etc, 1 tsp of extract should be enough. You can use lemon juice, but in my experience and basic kitchen technology, it has always curdled somewhat, yeilding a less smooth finish. If you do choose juice, you will obviously need more. The mixture pre-chill is completely palatable, so 'season' to taste. I would 'season' it a little too much, if you get me, because the flavour will lose edge as it cools.
Refridgerate for at least 4 hours, but prefferably overnight.
And that really is it. Once the ganache has set, spoon out teaspoonfuls and roll into balls in some sort of coating. For milk, dark or bittersweet chocolate, cocoa powder is a simple and classy finish. For white chocolate, you can achieve a similar effect with iciing sugar, or a blend of icing sugar and cocoa sieved together. I think white chocolate truffles are so sweet that the icing sugar can kill them somewhat, but that's jsut my point of view.
For more 'exciting' coatings, this year I used for my milk chocolates:
bittersweet melted chocolate
chocolate sugar strands
chocolate curls
chocolate sprinkles.
And for the white chocolates (which is where the title becomes apt):
various pink sprinkles
hundreds and thousands (non pareils) in pink and multicoloured themes
pink sugar strands
pink glitter sugar
There are no words for how festive these looked. In a cut glass candy bowl, they looked like shining baubles.
I must apologise for a lack of pictures in this post. I shall add some later. I am having a little camera difficulty at the moment. That and since a large number of these have been snaffled, I may have to make a whole new batch to photograph. What a pity... wink wink.
Sunday, 19 December 2010
It's the most wonderful time of the year...
To me, something which is uniquely and absolutely Christmassy is the food. Sumptuous feasts aside, Christmas is the season of nibbles and canapés and sweet treats and cakelets. It is the season of baubles and trinkets, where no one can judge you on your frankly outrageous overuse of non pareils and what not.
I don’t know whether it is simply because I am a glutton, or because I am from eastern European stock (sometimes I believe the two are more than related) but Christmas to me just isn’t Christmas without baking; filling the besparkled and bejewelled house with spiced clouds of aroma that help defrost even the frostiest of unfestive humbuggers.
I bake pretty much everything in our house when it comes to Christmas. We often buy posh continental biscuits, and the obligatory tin of chocs, and real german pfeffernusse, if we can, but the house (as it should be at this time of year) is well stocked with homemade mince pies, lebkuchen, Christmas cake, brownies, sugar cookies, tarts, chocolates, petit fours, cheese savouries and pretty much any other festive recipe that tickles my fancy.
Money is tight this year, so my ingredients fund is tighter. Therefore, bakes are coming in dribs and drabs, but already my cranberry sauce is stashed in jars in the cold store. In the ’pantry’ cupboard I’ve stored cranberry and homegrown tomato chutney from the summer, and range of homemade spiced jams (perfect for making tarts for those who don’t like mincemeat, or Christmas presents). Last week I gleefully threw together my cranberry mincemeat (a faithful Nigella recipe I simple couldn’t do without) and mince pies (sadly now mostly gone- I make must knock up another batch!). This week I must resist the Christmas cake completely, ready for it be dressed up next week. More immediately I have planned a tart citron (which is rapidly becoming a speciality!) to appease my gluttonous but frosting hating brother, and a cranberry bake well (another Nigella I have discovered) in order to appease my a) adoration for cranberries, however terribly unbritish they may be, b) my love of almonds and c) my chronic, incurable sweet tooth. There is nothing like a festive twist on a traditional, sweet and filling pastry to chase away the winter blues.
However, most pressingly, and most Germanic of me, I must make up my first batch of Lebkuchen!
Though I’ve baked all my life, I’ve really come into baking blossom in the last few years. This also coincided with our local delicatessen no longer stocking traditional german biscuits at Christmas. I once travelled to Colchester and back for some, but really, that’s a little excessive, even for something so delicious as Pfeffernusse. I found, around this time, my Lebkuchen recipe, and I have loved it ever since. There is nothing quite so Christmassy for me as a hot steaming pot of honey and lemon for the mixture, and the joyous burst of spice; ginger, cinnamon, clove, allspice, nutmeg and black pepper, as they fill your lungs and heart, released when the batter is mixed, and more so when baked. Every Christmas Eve I bake a fresh batch of lebkuchen and sit up, watching terrible television, or sometimes more wholesome carols and services, surrounded by the Christmas lights as I ice them, ready for Father Christmas, and then my family, to enjoy.
When I say bake, it means just and only that. Lebkuchen, like many Christmas recipes, needs time refinishing, for the flavour to develop. As delicious as it is, it is not something to be rustled up in a couple of hours, or even really a day. I leave my dough in the fridge to develop for two to three days. The minimum, really, should be 24 hours after mixing, though I suppose a few hours would suffice. Not only does it allow the spices to infuse, but this dough is very wet compared with many biscuits doughs, and the time allows it to firm up at least a little. Also, this dough makes A LOT of lebkuchen! You could easily divide it into three parts, using one after a day and so on.
Lebkuchen
200g honey (I use a lovely local honey, but really any honey will do)
200g muscovado sugar
50g unsalted butter
Juice of a lemon
Zest of one orange and one lemon (if you only have clementines and they are being zest resistant, just squeeze out a little juice with whatever zest you manage to get)
2 free range eggs
550g plain flour
1/2 tsp bicarbonate of soda
2 tsp cinnamon
2-3 tsp ginger (depends how hot you like your ginger biscuits!)
1/2-1 tsp ground black pepper
1/4 tsp nutmeg
1/4-1/2tsp mixed spice
To decorate:
Royal icing
Silver and gold balls and dragees, non pareils or really whatever you like.
In a large saucepan (large enough to be used as a mixing bowl later in the recipe), combine honey, lemon juice, butter and sugar over a low heat until the butter is melted and the sugar dissolved. This takes about 15 minutes, but stay with it to stir as it goes. Remove from the heat and allow to cool until lukewarm.

Zest the orange and lemon (I hate this part but it’s important for flavour) and whisk into the cooled honey-lemon mixture, along with the eggs.
Stir in all the dry ingredients (flour, bicarb, spices) bit by bit. If you’re fussy you can sieve or whisk the dry ingredients before adding, but I’ve never had a problem just stirring them in.
Spray the inside of a large plastic freezer bag with oil. Frylight is fine for this. Alternatively rub with some oil with your hands. Place the dough in the bag, squeeze out the air as best you can and twist to secure it. Chill in the fridge for as long as you are going to.
When you are ready to bake, preheat oven to 180/170 (which I believe is Gas Mark 4). Line baking sheets with parchment.
Roll out the dough as you like. Traditional lebkuchen are quite thick and puffy and slightly soft. If you like really crisp gingerbread, roll it to about 4-5mm thick. Otherwise, about 8-9mm is good, or you can thicker.
Cut out your desired shapes and place on your sheet. Small (>3cm in diameter) cookies will take only 7 minutes or so, but check at 5. Medium biscuits (around 5cm in diameter) will take 8-9 minutes. Larger biscuits or gingerbread house pieces could take as much at 12 or so. I would check small ones at 5, medium at 7 and large at 9. The desired colour when done is a light gingery golden, though even when browned as the thinner biscuits often get, they are delicious.
Once cool, you can ice as you like. I either draw outlines or stars at each corner, and top with a dragee or silver/gold ball. On reindeer, however, I give them an eye, and either draw a saddle, or give them a my little pony style bum patch! If you want to use these as Christmas decorations, use a drinking straw to punch a hole prebake, and thread a ribbon through before icing, or once the icing has set (about 12 hours). You may need to reopen the hole a bit with a skewer because they do rise up a bit, but the biscuits are tough enough to take it. You can also make attractive stained glass cookies, or windows for a gingerbread house, by smashing boiled sweets, and placing them in holes cut in the cookies prebake. These melt in the oven and set as the biscuit cools to create a stained glass effect. Very attractive!

A hamper I made up as a gift. You can see the iced lebkuchen at the back. Unfortunately I overlooked taking a picture before I packed them!
Friday, 24 September 2010
Red Velvet Joy
However, the planets aligned. The stars spoke forth unto the sibyl, and I found myself with buttermilk, red food colouring, marscapone and whipping cream. It was time.
I found a recipe on Joyofbaking.com which I decided to try. The exact recipe I used (and then tweaked) has been changed on there, but as far as I can see it has mostly just been halfed. However, I have listed below the exact amounts I used, and the method.
Red Velvet Cupcakes
300g golden caster sugar
2 free range eggs
1 tsp vanilla extract
250g self raising flour
3 tbsp cocoa powder
240ml buttermilk
2 tbsp liquid red food colouring (N.B this is about 2 whole bottles.)
1 tsp distilled white vinegar
1 tsp Bicarbonate of Soda
Preheat oven to 170 and prepare 15-20 cupcake tins/silicones, depending on the size of your moulds.
Cream together the butter and sugar. I actually ran out of golden caster sugar during this bake, so I used about 100g of soft brown sugar to compensate. This worked very well.
Add the eggs and vanilla to the butter mix, and beat until thoroughly combined.
Combine flour and cocoa in a separate mixing bowl.
In measuring jug, measure out your buttermilk (N.B even though the carton said more than that, mine measured out as this perfectly) and add the red food colouring. Whip together.
In a small bowl or measuring cup, combine vinegar and bicarb. Allow to fizz, then combine quickly but gently with the cake mix.
Making haste, not speed, divide the mixture between your cases and put in the oven to bake for 15-18 minutes.
Perfect Cream Cheese Frosting
230g cream cheese
230g mascarpone
1 tsp vanilla extract
120g icing sugar
360ml whipping cream
Remove items from the fridge. It is not essential to let them warm up, as you are going to be whipping them thoroughly.
Beat together the marscapone and cream cheese until completely combined and fluffy.
Using an electric whisk, whip the cream until stiff.
Sift the icing sugar into the cream cheese mix, and then fold the cream in to combine gently but thoroughly.
Spread or pipe as you like.
I think these are probably the prettiest cakes I have ever made. Ever. In my life. I was a little overcome, actually. And they were almost unnervingly delicious. The cream frosting was so light and sweet and moreish, and the cakes had the smoky touch of cocoa, but were so moist and delicious. If I could change anything about the bake, it would be that mine weren’t quite as dayglo red as some examples I’ve seen. I will happily and hungrily work on that!
Sunday, 19 September 2010
Bananarama: Chocolate Banana Cupcakes
Now, this post begins a theme; a series of recipe trials celebrating one of my favourite fruits; the humble banana. I’m currently looking for the perfect banoffee cupcake recipe to make it quadrilogy of deliciousness, but for now I have three fantabulous recipes that I will be sharing with you over the coming months.
To start us off, we have the Chocolate Banana Cupcake, with dark chocolate ganache frosting. The original recipe, pre my tweaks, is here.
Chocolate Banana Cupcakes
Makes about 24 good sized cupcakes
400g golden caster sugar
250g self-raising flour
75g cocoa powder
½ tsp baking powder
2 large free range eggs
3 small ripe bananas (or about 2 medium, or 1 very large)
240ml warm water
120ml milk
120g butter, melted
1 ½ tsp vanilla extract
Preheat the oven to 180/160. Melt the butter in the microwave.
In one bowl, combine all dry ingredients (sugar, flour, cocoa, baking powder)
In another bowl, mash the bananas. Then whisk in the wet ingredients (butter, water, milk, vanilla and eggs) fairly vigorously to incorporate air.
For reference: the size of bananas I used beside a teaspoon
Combine the two mixtures together, adding wet to dry until evenly mixed. You will have a very liquid, aerated batter. This is normal. Do not panic.
Ladle or pour the batter into either a pre-lined muffin pan or, like me, into your silicone moulds. A regular cupcake mould should be full up to about ½-1 cm below the rim.
230g very good quality dark chocolate
180ml double cream
14g unsalted butter
Break the chocolate into small pieces in a heatproof bowl.
Heat the cream and butter in a pan over a gentle heat, stirring until the butter has melted.
Bring the cream just the boil, then remove from the heat immediately and pour over the chocolate.
Leave for 3-5 minutes, then come back and stir to combine.
Stir/Beat vigorously for 2-5 minutes, then allow to cool and thicken until thick enough to pipe or spread.
Pipe/spread onto your cakes as you please. Decorate with sprinkles, foam bananas etc.
I gave a plate of these to Looby because she wasn't feeling well. They certainly perked her up!
Monday, 13 September 2010
Happy National Cupcake Week!
But I am very excited, Dear Internet. Have you heard? It’s National Cupcake Week! Happy National Cupcake Week, Dear Internet? Have I managed to convince you that it is National Cupcake Week yet? Ohoh! In celebration of our favourite confection, I plan to share with you a series of bakes this week, all wonderfully scrumptious and darling cupcakes! Hoorah! The itinerary may or may not include:
Red Velvet Cupcakes
Chocolate Banana Cupcakes
Lemon Meringue Cupcakes
My plan is to post up about 3-5 bakes between today and the nineteenth. This will depend, firstly, on my internet access- some horrible folk decided to cut my internet and phone lines on the 8th, and I have been without it ever since! Boohoo! Secondly, it will depend on time constraints. I may throw in a LFMF to fill in a gap!
Are you excited, Dear Internet? Possibly not. But do be excited, and ecstatic, and exultant, and express you sheer glee at the fact that it is National Cupcake Week, and you don’t need to find an excuse to enjoy pure deliciousness! Huzzah!
Saturday, 4 September 2010
Bloodthirsty Bakerings
I don’t want to get into a debate about the merits (pah), lols (many) and brainaches (no comment) of the Twilol saga and its films. I will say that I am a writer, and yes, I do know that they are terribly written garbage books. But I will also tell you that I did read all the books, to the end, and I quite liked, for the most part, and at the very least, the first one. And I do like the films on the whole, because they are easy to make drinking games to and are generally full of giggles and abdominal muscles and I am weak, dear Internet, weak! I’m so sorry to let you down. Will some recipes and anecdotes cheer you up, my sweet, my love, my dearest darling?
My cousin got us tickets to the Eclipse midnight preview showings in Rochester. I was terribly excited to be going/getting out of the house/having a social life/abs, dear Internet, abs. My end of the bargain was to bake us some sugary treats for the film. My cousin was excited, being quite a fan of my oatmeal cookies (which I will share with you in due course), but she didn’t know whether to be thrilled or disappointed when I told her I was going to do something else.
I essentially made sugar cookies, though one recipe was not what you would really call a sugar cookie. I have to confess to finding sugar cookies a bit dull. I think I need to roll them thinner so I get more icing. I have a very sweet tooth, as I am sure I have mentioned. Overall, really, I’d rather have a lebkuchen underneath that frosting. Hmm. That’s an idea. I do make good lebkuchen, after all. But anyway, plain white biscuits… they were tasty, but I can think of more delicious things, though this was the best they‘ve tasted to me thus far. They also, to me, are a bit too dry… Convince me otherwise, great Internet! Perhaps I need to fiddle with the recipe, particularly the flour content.. *plots merrily*
For the first half of the recipe, I made regular sugar cookies with homemade royal icing. I have NEVER royal iced a cookie before. I’ve used tube icing from a shop, but never my own piping bags, never my own icing, and never in the trendy way all the cool bakers are doing it. So whilst they came out as typically rustic and unpolished as my usual work, I was very proud of them. There were a couple of designs I loved in particular, which I will share below.
Royal Iced Sugar Cookies
Sugar Cookies:
175g unsalted butter, softened/room temperature
230g golden caster sugar
2 eggs
575g plain flour
1 tsp baking powder
1 tsp vanilla extract
In your processor/mixer, or by hand, cream the butter and sugar until smooth. Beat in the eggs and vanilla.
Combine the wet ingredients with the dry until an even pale dough is formed. Chill for at least one hour.
Preheat oven to 170/160. Roll out the dough to approx 1/4 inch thickness, and cut out the desired shapes. Bake for 6-8 minutes for a medium sized cookie. You will need to adjust the time (and possibly heat) if your cookies are smaller or larger, or thicker.
Royal Icing:
2 Free range eggwhites
1tsp lemon juice
approx 600g Icing sugar
While the cookies are cooling, you can make your icing. Bear in mind that royal icing needs about 12-24 hours to set well, though we ate our cookies after about 6 hours. A crust had formed, but the icing was liquid underneath. The icing will preserve the cookie, so it won't go stale under that icing if you leave it out on a cooling rack to set overnight.
Put your eggwhites and lemon juice in your processor/mixer with a whisk attachment. You can do this manually, but you will need to patiently sift your icing sugar every time you add some, and be prepared to work those arms!
Add some of the icing sugar (about 50-100g) and start the motor. Add icing sugar as you go, until you have stiff peaks. Depending on your eggwhites, this might be less or more than the icing sugar allowed.
This stiff icing is perfect for outlining. For the flood icing, you will need to add a little water, drop by drop, back to the mixture and keep whisking until you have a sticky liquid that flows back steadily when you pass a spoon through it. For a coloured icing, if, like me, you only have liquid colour, don't use water, and use the food colouring to provide the liquid instead. If you have the gel food colourings (which are wonderful and are on my christmas list) you will just need a couple of drops for vivid colour, so will need to add a little water as per the above method.
Outlined cookies. I need more practise and a narrower pipe nozzle!
Aren't they totally ugly? For serious! But I had so much fun making them!
These people are far more experienced, talented and worldly in the art of royal icing sugar cookies. Between them and many, many others, I worked out how to make royal icing.
http://www.universityofcookie.com
http://iammommy.typepad.com/i_am_baker/
http://chiccookiekits.blogspot.com/
http://sweetopia.net/2009/06/cookie-decorating-tutorial-general-tips-butterfly-cookies/
My second recipe was based on something I had seen on the internet (though I can‘t remember where), tried, failed horribly at, and had never touched again. It was the first time I had tried a ‘cup’ measured recipe, and I haven’t bothered since. I think I would need a course in American baking before I would put myself through the humiliation again. If someone knows a cup calculator that is trust worthy, go ahead and forward to me, but I’ve had my fingers burned, and I haven’t forgotten.
These are ‘Vampire Bites’. They are glam jammy dodgers underneath their gory exterior. They were almost too much fun to make, and inspired some of my icing on the royal iced cookies. If I did it again, I would be tempted to try shortbread for the cookie mix. I’m sure I will regale you with that when the DVD comes out…
Vampire Bites
Sugar cookies as above.
Red jam (Strawberry or raspberry)
Cut out an equal number of cookies.
Place half the cookies on a parchment lined baking sheet. Place about 1/2 heaped teaspoon of jam in the middle.
Place a second cookie on top of the jammed one and gentle press around the outside, joining them and making a sealed pocket of jam inside.
Next, take a toothpick, and gently poke in your teeth marks, gently swivelling to widen the fang holes.
Finally, dip your toothpick in the jam, and make dribbles of gore down from the bite marks. Tasty!
Bake as with the regular sugar cookies.
Aren't they cute! Great for any vampire themed event, or Hallowe'en! And super tasty! The jammy cookies were so yummy. A perfect compliment to chiselled abs and teenage angst at midnight. And this is definately true: Sugar highs improve Twilight no end.
Adieu, Dear Internet. Until next time!
Saturday, 28 August 2010
Mum's Crumble
This recipe is going in there as soon as I’m done posting it up. What better to put in a recipe book than a recipe from my mother?
Mummy and I have been being ever so countrified of late. We’re going blackberrying tomorrow. I’m looking forward to it! There’s nothing like starting autumn with a trip out to collect delicious blackberries for a crumble. However we started about ten days ago, when we collected wild Yellowgages from the orchard in our village. If you don’t know what a Yellowgage is, here’s a photo:
Next were the first of the apples from the orchard. They are all such antiquated varieties we simply can’t tell by looking at them which are ‘eaters’ and which are ‘cookers’!
A few days later we raided the more traditional plum trees at the end of our road. We’re lucky to live in a very rural setting!
After this ‘scrumping’ adventure, we decided to make a Crumble with some of the red plums and the apples. And this was when Mummy shared her super simple, super delicious crumble recipe.
Mum’s Crumble with Wild Plums and Scrumped Apples
Ingredients:
4oz Golden Caster Sugar
4-5oz Plain Flour
4oz Unsalted Butter, chilled
Plums and Apples- We used 4 medium-large apples and about 10 small plums, but it depends on the size of your fruit and the size of your baking dish.
Extra sugar (optional)
Preheat your oven to about 180/160/Gas Mark 4.
Chop your butter into cubes.
Pour sugar over butter, and sieve in 4oz of flour.
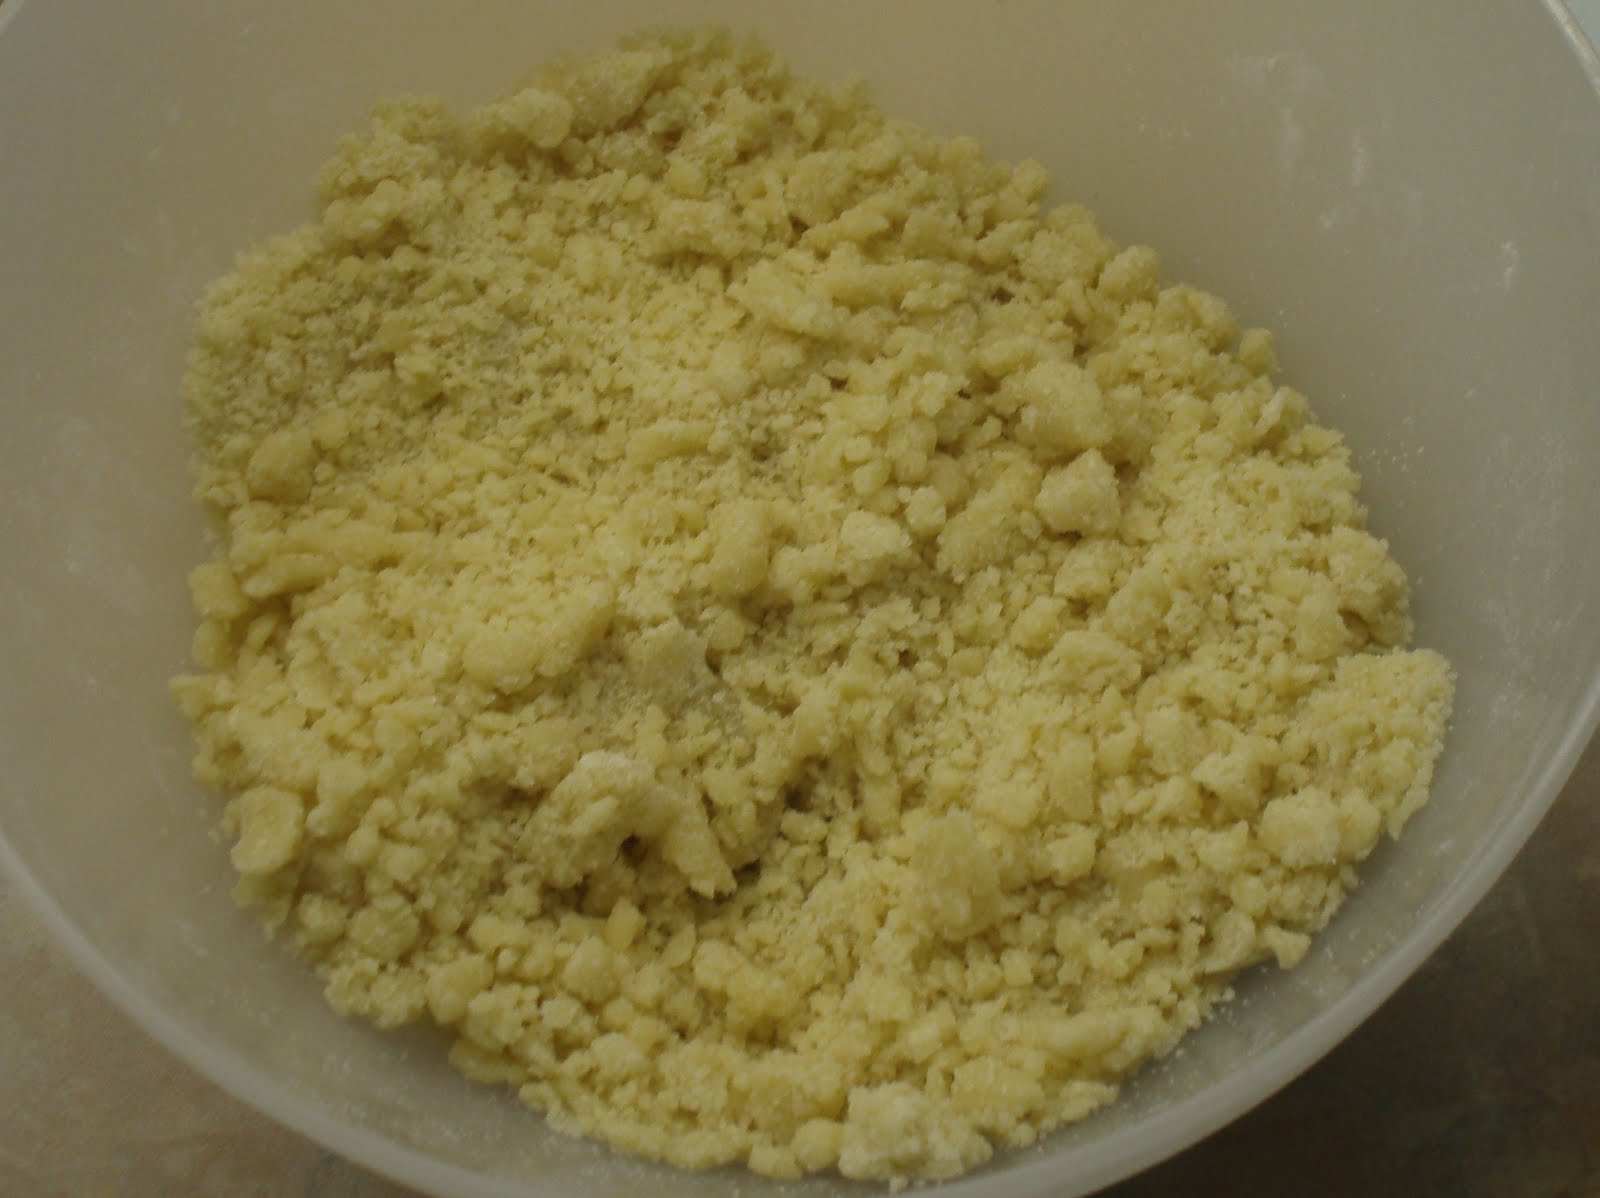
Rub together until the mixture has a uniform, crumbly texture. Do not knead as you would to make cookie dough. If the pieces are too big, or it clumping too much, add more flour. About 1oz should be plenty. Be careful not to over work it, though if this happens you will just have an ugly and still delicious crumble. Hey ho. That’s what we’re all about here. Ours was a little on the ugly side, or should I say the sexy homemade looking side, oh baby oh baby.
Peel and core your apples. Stone your plums. Chop your apples into slices and layer into the dish. Intersperse with torn pieces of plum.
Pour over the crumble, ensuring you have an even coating and all the fruit is covered over.
Bake in the middle of the over for 25-35 minutes.
Serve while still warm with ice cream, cream or custard.
Unfortunately, I was so goshdarn hungry for crumble come eating time, I forgot to take a photo of it when we got it out of the oven. It looked AMAZING. And it tasted FABULOUS. If you use eating apples, they will go very very soft in the oven. As it was, it turned out we had a mix, the plum and eaters were all melty, whilst the cookers had an amazing sour bite to them. What a combo~
I know I'll be making another one of these, oh, tomorrow, but this time with blackberries. The crumble topping can be applied to any fruit! Aren't I good to you, dear internet?
Wednesday, 18 August 2010
To Simon, With Love
Now, I did some baking while I was away, and a couple of bake lessons for my kitchen-shy pal Pam, and particularly considering the oven we were using (which doesn’t believe in cooking anything. EVER) we did exceptionally well! I intend to fully write up those bakes soon, but in the interim, Dear Darling Simon asked that I posted a recipe for him, so he could make cupcakes for this weekend. So, consciously curbing my hyperbole, and, alas, omitting images, here are my White Chocolate Chip Cupcakes with Vanilla Butter Cream!
White Chocolate Chip Cupcakes
Makes approx 16 regular sizes cupcakes
225g golden caster sugar
225g unsalted butter (room temperature)
1tsp vanilla extract
4 Free Range Eggs (room temperature)
225g Self raising flour
White chocolate chips.
Preheat oven to 180c (160c fan assisted).
Cream the butter and sugar together. Once combined, mix in the vanilla.
Beat in the eggs. The mix will look curdled and disgusting, but fear not! From ugliness, comes deliciousness. Beat this mix fairly vigorously to encourage air into the blend.
Mix in the flour and chocolate chips until the mixture is pale in colour and even in consistency.
2/3 fill your muffin cases, and bake for 13-15 minutes, checking at 13.
Vanilla Butter Cream
113g Unsalted butter
1tsp Vanilla extract
250g Icing sugar
1tbsp milk/single cream
Sieve the icing sugar into a bowl.
Add the butter and vanilla and cream together until the mixture is dry and almost even in consistency.
Add the dash of a milk or cream and mix thoroughly.
If the mixture gets too wet, add more sugar, and more milk/cream if it still to dry.
Decorate as you please!
And because I think this would be great, an alternative topping for you!
White Chocolate Ganache
227g White chocolate (good quality (Menier/Green and Blacks etc))
180ml Double cream
28g Butter
Break up the chocolate into small pieces and set aside in a mixing bowl.
Heat the cream and butter in a saucepan over a medium heat, stirring as you go.
Bring the mixture to the boil and immediately pour over the chocolate. Let this mixture stand for a few minutes to make the chocolate melt, then beat vigorously with a whisk. This will make the mixture thicken.
Refridgerate for about an hour, and then the mixture can be piped. If you wish to spread the mixture onto the cupcakes, let it come back to near room temperature before you try.
Hope that helps, Simon dear!
Tuesday, 20 July 2010
Celebrating Summer: Strawberry Cupcakes
I wanted to make my own!
So I scoured the internet, and found a recipe that suited on cooksunited.co.uk. The whole first batch I made with this recipe I threw out for the birds (see this post), which was a real shame, as that’s a hideous waste of materials. However, second time around, I ended up with some pastel pink, aromatic and incredibly light cupcakes. And the frosting… stuff you Starbucks, I can do better at home!
I had to mess the recipe about a bit, mainly with the cooking times and temps, and it is one I want to mess around with more, but this is what I did for the firstrun. Apologies now, and always, for my hideous food photography.
Strawberry Cupcakes
Makes 12-16, depending on how big you make your cuppies.
For the cakes:
100g fresh local strawberries, hulled and halved
1sp baking powder
180g flour
60ml milk
120g butter (salted or unsalted, depending on your preference)
200g golden granulated or caster sugar
1 large free range egg
2 large free range egg whites
1sp vanilla extract (not essence; you’ll thank me)
Preheat your oven to 170/150 fan assisted. Line your muffin pan with paper cases, or, if you are like me, line a baking tray with silicone cupcake cases.
In a blender, puree the strawberries. Try not to glug the delicious fruity goop down on its own. Be strong. Set it aside.
Combine flour and baking powder in a mixing bowl. Set aside.
With an electric mixer (hand or processor) cream the butter until fluffy and pale, then gradually add the sugar and continue to mix.
Add one egg and mix thoroughly.
Separate off your egg whites. Add them to the mix with the vanilla and blend/beat well until the mixture is well aerated and uniform.
Combine the strawberry puree with the milk. Marvel at your milkshake of awesomeness, but do try not to drink it. Add the ’milkshake’ into the wet mixture, mixing well.
Combine the wet mixture into the dry flour mixture about half and a time. Be careful not to beat too hard; you want to preserve the air in the mix from the egg beating. Continue until mixture is even in colour (pale, pretty pink) and texture.
Spoon out your mixture into your prepared cupcake baking receptacle(s). I made mine quite small, so it worked out to be enough batter for 16. The recipe is meant for 12 good sized cupcakes.
Bake for 15-18 minutes. Mine were a little more well done than I would have liked (I baked for 18), despite taking 7 minutes off the original baking time. If you are baking 12 large cupcakes rather than my 16, 18-20 minutes should be plenty. When done, the outsides will be prettily golden (darker if like me you use unrefined sugars), the insides fluffy and pink.
Allow to cool in pan/on tray for about 5 minutes, before removing to a cooling rack. Mine fell out of their silicone cases with ease at this stage.
For the butter cream and decoration:
Strawberry Buttercream
50g fresh local strawberries, hulled and halved
250g butter
400g icing sugar
50g golden caster sugar (can replaced with icing sugar)
1 sp vanilla extract
Optional: decorations like sugar pearls, dragees, confectioner’s glitter, glitter sugar etc etc
While the cakes are cooling, make your butter cream. Puree 50g of fresh hulled and halved strawberries in a blender. Alternatively, blend them when you do the 100g for the cakes, and remove a third and set to one side.
In an electric mixer, or by hand if you are tough and awesome, cream 250g butter until fluffy.
Add the sugar(s) and blend well.
When the butter cream is beginning to come together, add the vanilla and strawberry puree, and watch the buttery mix turn into pure pink paradise.
When the cakes are cool, ice as you like with the butter cream (I *attempted* to pipe mine) and decorate as you will. I made mine as blousy and ridiculous as possible, and I think they looked soooo cute.
Due to the fresh fruit content, these will keep for longer and keep better in the fridge. They taste best within 1-2 days of baking.
When it came to decorating, my main issue is a) the butter cream was too cold because we’d had to refrigerate it when the first batch of cake failed. When I do this again (possibly later this week!) I will make the butter cream only when I am ready to use it. Also, I have a nasty neck injury from a car accident earlier in the year. I have numbness and muscle weakness in my arms, particularly the left, and I found it very difficult to pipe the not warm icing, and really quite painful. I‘d lost most of the sensation in the arm by the time I was done! I look forward to trying again with fresh, malleable icing. Also, I hate to blame my tools, but my piping bags are certainly not a grade, and I really do lack experience. This is probably my first time piping buttercream. Ah well, I can’t get worse!